 AdminAdministrator AdminAdministrator
Postari: 67
|
|
Aici inveti cum sa iti creezi si u niste Grafiti.. Asha ti le pui in camera..
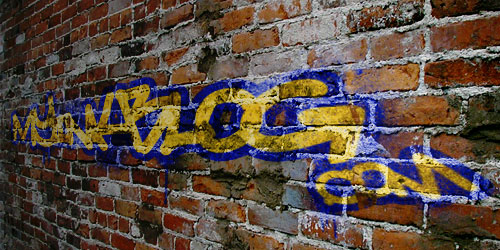
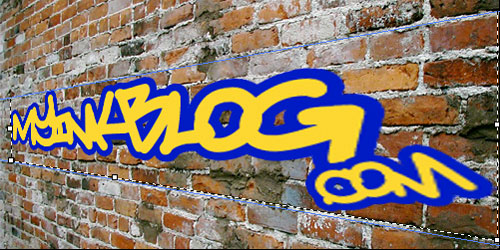
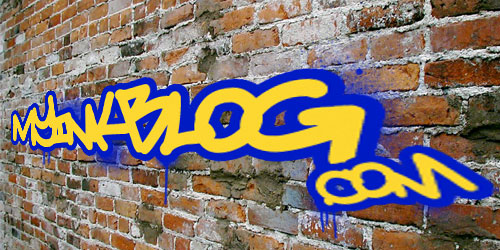
Asha o sa fie cand o sa fie terminat...
Pasul 1
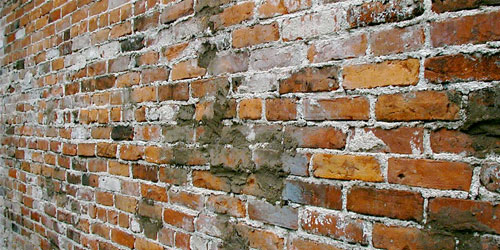
Găsiţi o imagine de un zid de caramida sau o cladire pe care doriţi să o utilizaţi ca fundal. Cel Am folosit poate fi descarcat de aici. Creaţi un nou document în Photoshop la dimensiunea pe care doriţi şi locul de caramida in top strat.
Pasul 2
Pasul 3
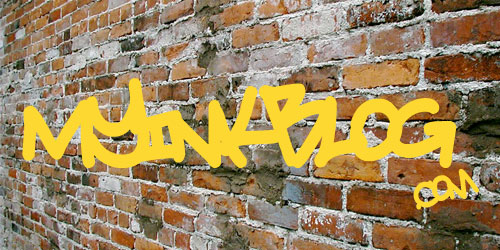
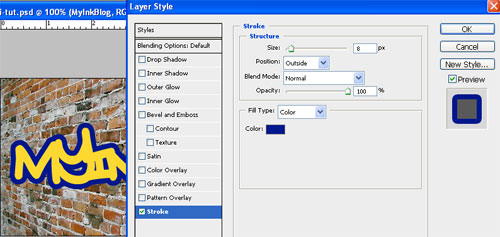
Adăugaţi o lovitura de grosime pentru a textului. Deschideţi fereastra stil de strat dublu clic pe numele următorul strat.
Pasul 4
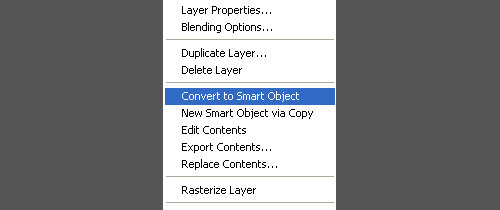
Avem nevoie de schimbare a perspectivei din acest text pentru al face să funcţioneze cu acest perete. Clic dreapta pe stratul de text şi alegeţi Trecerea la un obiect Smart opţiunile care apar
Pasul 5
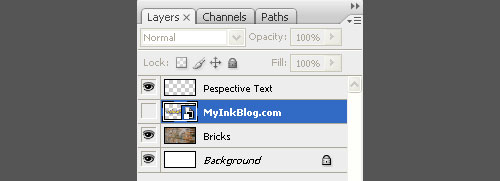
Apăsaţi CTRL, faceţi clic pe o miniatură de lângă numele dvs. strat de text, selectaţi acest strat care apăsaţi "ctrl, c-un strat care copia în clipboard. Acum ascunde strat, făcând clic pe ochi la următorul nivel. Apăsaţi "Ctrl, d 'pentru clare de selecţie. Faceţi clic pentru a adăuga un nou strat în sus şi numele de "perspectivă de text" sau ceva de acest fel. Acesta a fost textul de după utilizarea vanishing punct.
Pasul 6
Cu 'vedere textul "strat selectate, faceţi clic pe Filtraţi-> vanishing punct. Cu aerul crea instrument selectate, faceţi clic pe cele patru puncte de vedere. Utilizaţi linia de caramida linii de lucruri pentru a vă ajuta. Asemenea, asiguraţi-vă că reţeaua este suficient de mari pentru a ţineţi-vă toate versurile.
Pasul 7
Apăsaţi "Ctrl, v ', pentru a lipi textul. Acum, apăsaţi 'Ctrl, nu-şi converti textul în loc. cand gasesti locul unde iti place apasa ok
Pasul 8
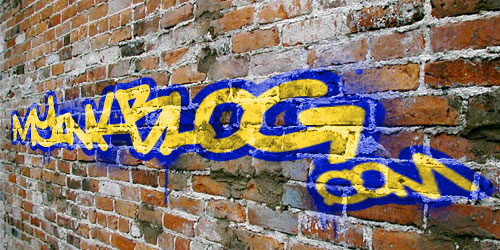
Creaţi un nou strat şi locul în spatele tău strat de text. Apoi luaţi o perie şi proiecţiile folosind aceeaşi culoare ca şi textul de pe împuşcat. Am folosit aceste perii, pentru acest efect. DAB unele vopsea, astfel încât să drips un pic de "textul de mai jos şi adăugaţi unele mici, în jur de splatters.
Pasul 9
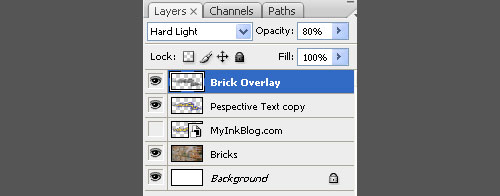
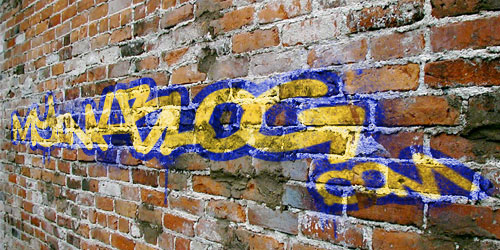
Merge de splatters şi textul straturi de evidenţierea atât straturi, clic dreapta pe unul şi alegând "merge straturi. Ctrl, faceţi clic pe miniatura în strat paletă de lângă numele nou strat fuzionat pentru a crea o selecţie de doar text si splatters. Acum, faceţi clic pe strat de cărămizi, şi să apăsaţi tasta "ctrl, c" pentru a copia doar de cărămizi, care sunt de mai jos textul şi splatters pe care le-aţi selectat. Creaţi un nou strat la bun început paleta de nume şi-l ceva de genul 'caramida de suprapunere ". Apăsaţi 'Ctrl, v', pentru a lipi cărămizi de pe acest nou strat. Apăsaţi 'Ctrl, Shift, and' pentru a desaturate acest strat. Schimbarea amestecului de hard mode pentru a lumina si de opacitatea la 80%.
Pasul 10
Adăugaţi un strat de a masca "prespective textul" strat. Acum ia unele dintre dvs. preferat de perii grunge. Am folosit aceste perii de la Bittbox. Schimbaţi-vă pentru a-plan de culoare neagră şi cu grunge perii vopsea departe unele dintre masca dezvăluie câteva din caramida strat de mai jos. Fii subtil cu acest pas.
Pasul 11
Efectul este deja destul de rău. Sa adaug un pic mai iluzia de adâncime. Asiguraţi-un nou strat la început şi el numele de "umbre". Prinde face un instrument de gradient gradient radial pentru a trece de la alb-gri. Faceţi clic pe partea dreaptă şi trageţi spre stânga, crearea de gradient. Schimbaţi modul de combinare a liniar scrieţi şi opacităţii la 75%.
Acesta este un adevăr foarte simplu şi eficient pentru a crea efectul de text. Sper că veţi găsi unele folosi pentru acest lucru în propria dvs. listă de proiecte. Dacă aveţi orice întrebări sau comentarii, nu ezitati sa folositi formularul de mai jos comentariu.
Aici ie in engleza daca intelegeti mai bine...:P
Code:
Step 1
Find a picture of a brick wall or a building that you’d like to use as a background. The one I used can be downloaded here. Create a new document in Photoshop at the size you’d like and place the bricks on the top layer.
Step 2
Step 3
Add a thick stroke to your text. Open up the layer style window by double-clicking next to the layer name.
Step 4
We need to alter the perspective of this text to make it work with this wall. Right click on the text layer and choose Convert to a Smart Object from the options that appear.
Step 5
Press ctrl, click on the thumbnail next to your text layer’s name, this will select that layer, hit ‘ctrl, c’ to copy that layer to the clipboard. Now hide the layer by clicking on the eye next to the layer. Hit ‘ctrl, d’ to deselect your selection. Click to add a new layer to the top and name it ‘perspective text’ or something of that nature. This is were you will place your text after using vanishing point.
Step 6
With the ‘perspective text’ layer selected click Filter->Vanishing Point. With the create plane tool selected, click for the four points of the perspective. Use the brick lines to help line things up. Also make sure the grid is large enough to hold all your text.
Step 7
Hit ‘ctrl, v’ to paste in your text. Now hit ‘ctrl, t’ and transform your text into place. When you have it the way you like click OK.
Step 8
Make a new layer and place it behind your text layer. Then grab a splatter brush and use the same color as the stroke on your text. I used these brushes, for this effect. Dab some paint so it drips a little below the text and add some small splatters around.
Step 9
Merge the splatters and the text layers by highlighting both the layers, right clicking on one and choosing ‘merge layers. Ctrl, click on the thumbnail in the layer palette next to the name of the newly merged layer to create a selection of just the text and splatters. Now click on the bricks layer, and hit ‘ctrl, c’ to copy just the bricks that are below the text and splatters that you have selected. Create a new layer at the very top of the palette and name it something like ‘brick overlay’. Press ‘ctrl, v’ to paste the bricks on this new layer. Press ‘ctrl, shift, u’ to desaturate this layer. Change the blend mode to hard light and the opacity to 80%.
Step 10
Add a layer mask to the ‘prespective text’ layer. Now grab some of your favorite grunge brushes. I used these brushes from Bittbox. Change your foreground color to black and with the grunge brushes paint away some of the mask revealing some of the brick layer below. Be subtle with this step.
Step 11
The effect is pretty sick already. Let’s just add a little more illusion of depth. Make a new layer at the top and name it ’shadows’. Grab the gradient tool make a radial gradient go from gray to white. Click on the right side and drag to the left, creating the gradient. Change the blend mode to linear burn and the opacity to 75%.
This is a really effective and fairly simple to create text effect. I hope you can find some use for this in your own projects. If you have any questions or comments, don’t hesitate to use the comment form below. |
|
|